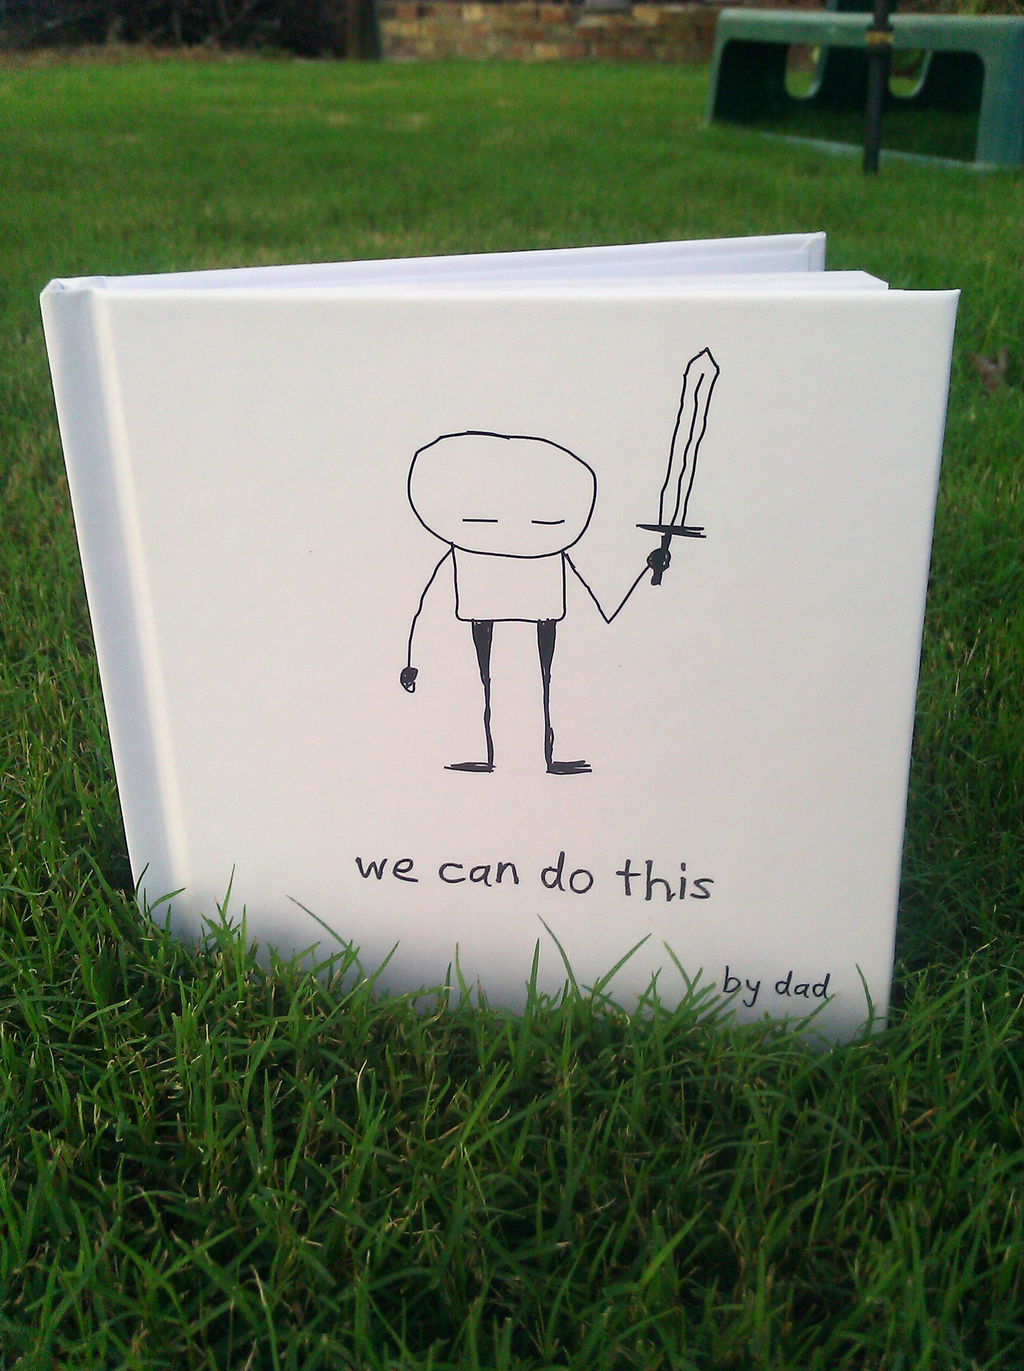
A few weeks ago I made a little book of advice for my daughter in a what-if-i-die-in-a-plane-crash frenzy before taking an international flight. The content comes mostly from a blog post I wrote during the week after her birth. Here is the book on Archive.org if you are interested. It is Creative Commons licensed so go nuts. This is a technical blog post about getting the book ready for the JIT printing process.
I used several free software tools in the process:
- vim (gvim specifically) is my editor of choice.
- Inkscape - vector graphics, layout.
- Ghostscript - PDF formatting.
- PDFtk - PDF manipulation.
I used blurb.com to print the book.
The following makefile converts the source SVG files for each page and the cover into separate PDF files, then assembles them into a single document, and then transforms the document into the PDF-X3 format that blurb.com requires.
SVGS=$(shell ls pages/*.svg)
PDFS=$(SVGS:.svg=.pdf)
PDFS_BLANK=$(foreach pdf,$(PDFS),$(pdf) page-blank.pdf)

all: we-can-do-this-cover_x3.pdf pages_x3.pdf

%.pdf: %.svg
    inkscape --without-gui --file=$< --export-pdf=$@ #--export-text-to-path

pages.pdf: $(PDFS) page-blank.pdf
    pdftk $(PDFS_BLANK) cat output pages.pdf

%_x3.pdf: %.pdf
    gs -dPDFX -dBATCH -dNOPAUSE -dNOOUTERSAVE -dUseCIEColor -sDEVICE=pdfwrite -sProcessColorModel=DeviceCMYK -sOutputFile=$(<:.pdf=_x3.pdf) -dPDFSETTINGS=/prepress ./PDFX_def_wecandothis.ps $<

clean:
    rm -f pages/*.pdf
    rm -f *.pdf
    rm -f _x3.pdf
To get these programs issue sudo apt-get install inkscape make pdftk
ghostscript on Debian GNU/Linux or Ubuntu. You can get the complete
source files for the book on
GitHub so that you can use
this as a template to make your own book. The SVG images for the pages
are in the pages subdirectory and the cover is
we-can-do-this-cover.svg. The makefile builds a "Small Square" (7 × 7
in / 18 × 18 cm) book but you should be able to change the source SVG
sizes to make a different sized book.
The font is my own handwriting. The original TTF is here.


